Tips to manually resize your recovery partition with a third-party partition tool:
You may have encountered Windows Update error (0x80070643) when trying to install the 2024-01 Security Update for Windows 10 Version 22H2 for x64-based Systems (KB5034441) .
Online, there is information from Microsoft that a cause of this may be that "some computers might not have a recovery partition that is large enough to complete this update". (See this advisory about KB5034441).
The solution provided for this is KB5028997: Instructions to manually resize your partition to install the WinRE update.
I find the number of steps involved and the deletion of the existing, otherwise healthy WinRE partition a little scary, especially considering the included note warning that the partition (re)creation may 'fail'.
It seems to me that it might be safer to simply shrink the existing O/S partition slightly (like by 500MB - 1GB or so) and then expand the existing recovery partition into the resulting unallocated space.
In my case, my C: drive's recovery partition was about 500 MB in size, (which was apparently 150 MB short of the minimum recommended size of 650 MB). I decided to increase my recovery partition's size to about 1 GB.
However, doing these partition changes with Windows default tools is cumbersome and inefficient. Instead, I chose to use a third-party partition tool that I was familiar with to do these changes, the MiniTool Partition Wizard.
(This guide is written on the assumption that the drive your recovery partition is on is NOT encrypted (using BitLocker) and that your recovery partition is positioned directly alongside of and to the right of your boot partition. If it is not, you can also use the MiniTool Partition Wizard to move it right next to your boot partition, but there are too many
possible
scenarios for how that should be done to detail here, depending on your current disk layout).
Here are my steps:
1. Open a Command Prompt (Run as Administrator).
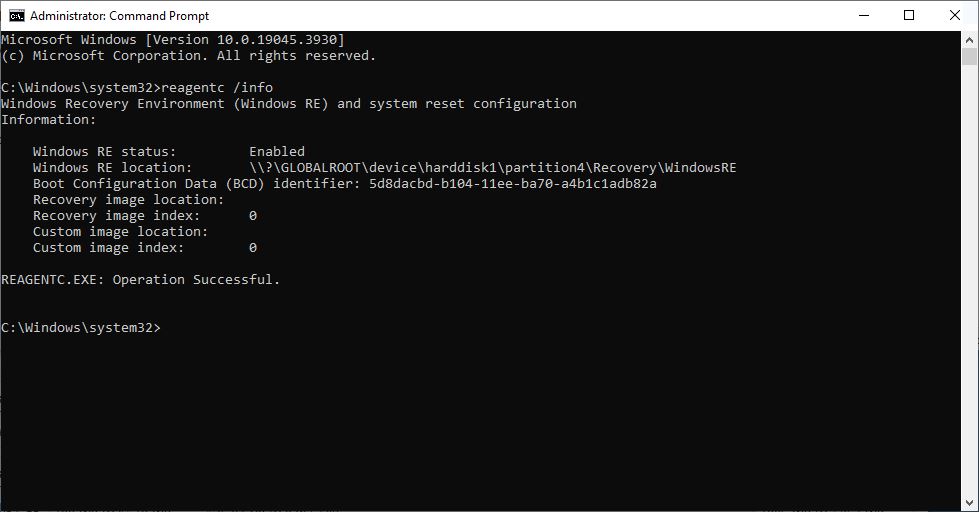
2. Check the status of your recovery partition by typing reagentc /info and hitting enter. You should get a Windows RE staus of 'Enabled' plus a defined Windows RE location, something like this:
3. Disable the WinRE, by typing reagentc /disable and hitting enter.
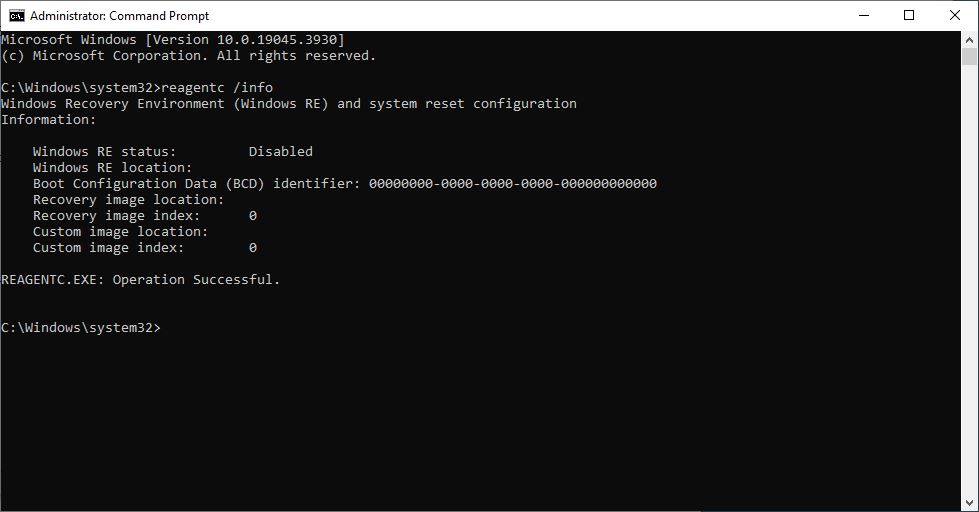
4. Confirm the disabled status by typing reagentc /info and hitting enter. This time you should get a Windows RE staus of 'Disabled' plus a blank Windows RE location field, as well as a zeroed out BCD identifier number, something like this:
5. (Install and) run the MiniTool Partition Wizard.
6. On the main Partition Management window, locate and select your Boot Drive's partition.
For me it was my C: drive on Disk 2. It's type was GPT (Data Partition) and it was the only partition whose status was 'Boot'.
7. Right-click on your boot partition and select Move/Resize. In the Partition Size field, click the down arrow to reduce the size by 1 GB. Make sure the Unallocated Space After field underneath increases it's value from 0.00 GB to 1.00 GB, (as seen below):
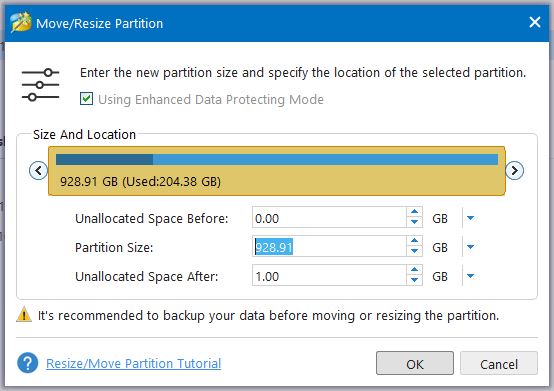
8. Click OK.
9. Back in the Partition Management window, locate and select the partition whose type is GPT (Recovery Partition). It should appear immediately alongside a new Unallocated space block, which should be next to your Boot partition.
10. Right-click on your Recovery partition and select Move/Resize. Drag from the middle of the yellow block, all the way to the left until the Unallocated Space Before field shows a value of 0.00 GB, (as seen below):
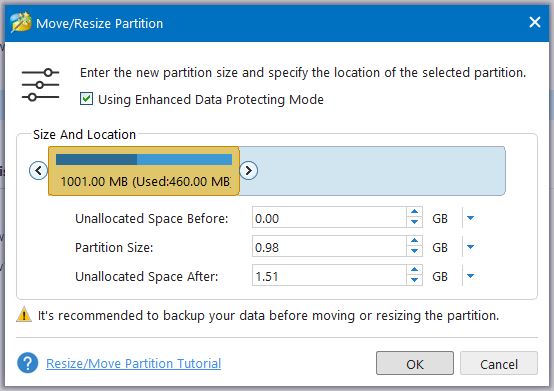
11. Click OK.
12. Click Apply.
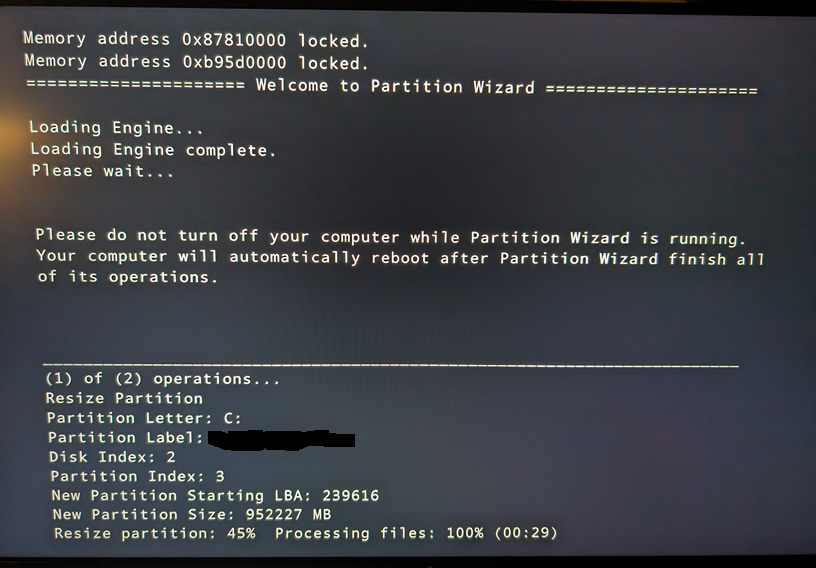
13. A window will probably pop up and tell you that the pending changes cannot be applied because the C: drive is in use. Close all of your other windows and tell it to go ahead and reboot your computer in order to apply the changes.
After several scary windows pop up during reboot with the partitioning changes taking place, your computer should finally boot up as normal. DO NOT interrupt the completion of this process.
14. Once more, confirm the WinRE status again by opening another Command Prompt (Run as Administrator) window and typing reagentc /info and hitting enter. You should again get a Windows RE staus of 'Disabled' plus a blank Windows RE location field, as well as a zeroed out BCD identifier number.
15. Enable WinRE, by typing reagentc /enable and hitting enter.
16. Confirm that WinRE is enabled again by typing reagentc /info and hitting enter. You should again get a Windows RE staus of 'Enabled' plus a defined Windows RE location. (though the BCD identifier number may be different than before).
17. Reboot your computer once more. Disable any antivirus or antimalware programs before trying to run Windows Update again.
---
You may find that you've resolved the Windows Update error (0x80070643) and that KB5034441 now installs successfully, like it did for me:
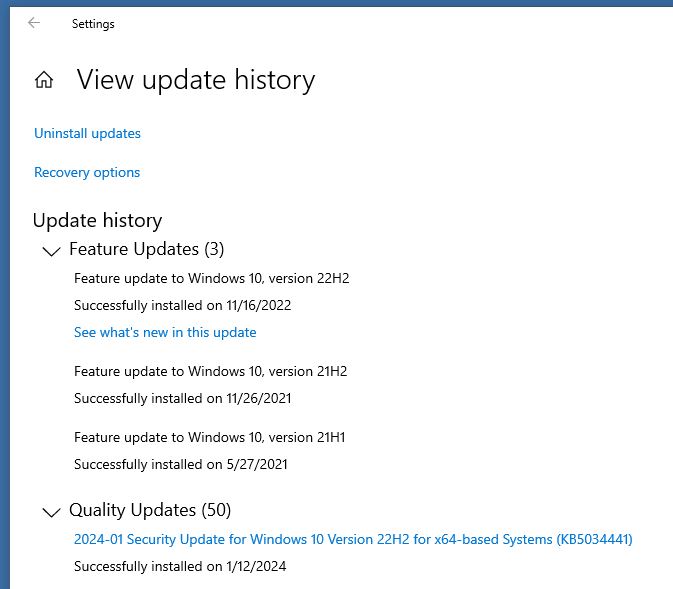
If not, you can try these addtional steps: