|
|
|||||||||||||||
 |
||||||||||||||||
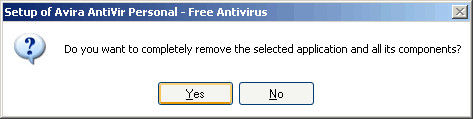
2. Download Avira AntiVir Personal Edition v10.0.0.567. Save it to the desktop or to another location where you'll find it easily. 3. Completely uninstall Avira v10.0.0.592 or v10.0.0.596 from Control Panel > Add or Remove Programs > (Avira AntiVir Personal - Free Antivirus) Remove button.
3a. Click Yes to completely remove. An Avira feedback page will load in your browser, which you can ingore.
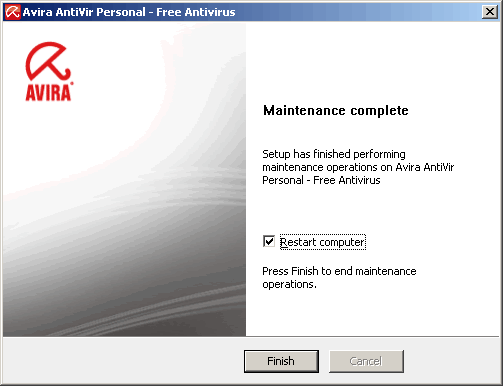
3b. Click Finish to reboot your computer and complete the uninstallation.
4. Navigate to the Avira v10.0.0.567 executable file you downloaded and double-click it to start the default installation.
5. Click the 'Continue' or 'Next' buttons through the defaults, except for those pictured below:
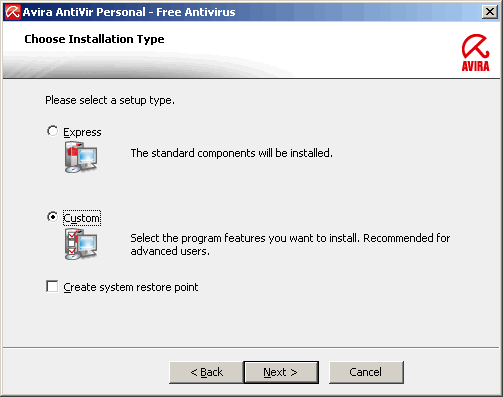
5a. On the 'Choose Installation Type' screen, chose ' Custom '.
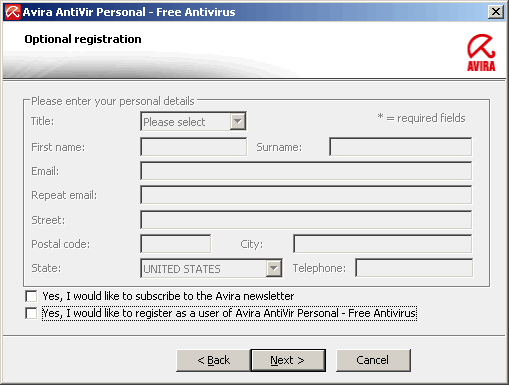
5b. On the 'Optional registration' screen, uncheck the box that says ' Yes, I would like to register as a user of Avira AntiVir Personal - Free Antivirus '.
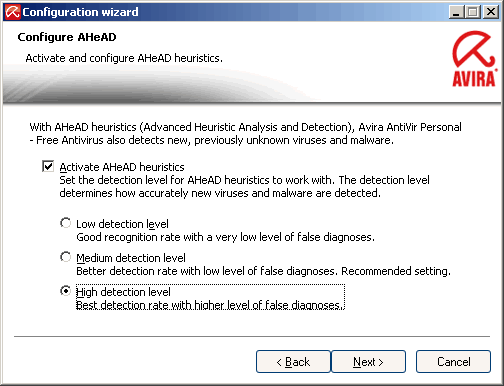
5c. On the 'Configure AHeAD' screen, chose ' High detection level '.
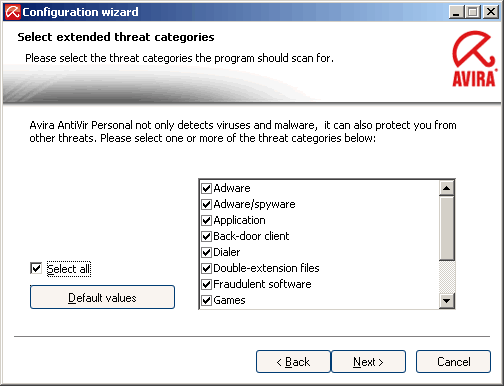
5d. On the 'Select extended threat categories' screen, check ' Select all '.
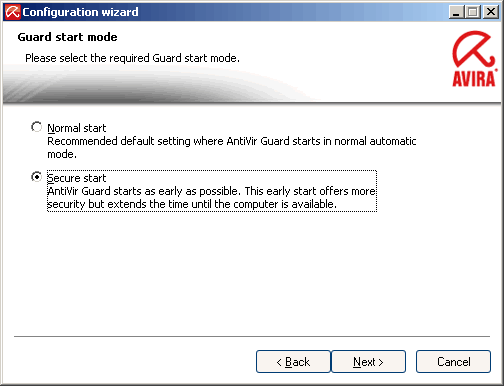
5e. On the 'Guard start mode' screen, select ' Secure start '.
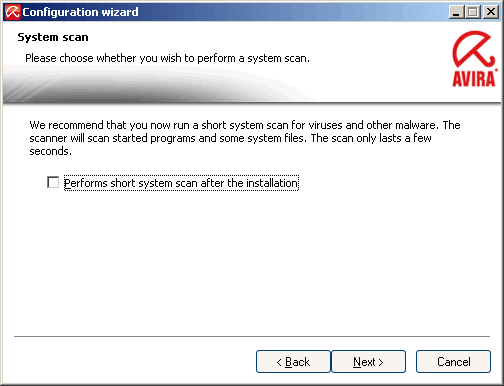
5e. On the 'System scan' screen, uncheck ' Performs short system scan after the installation '.
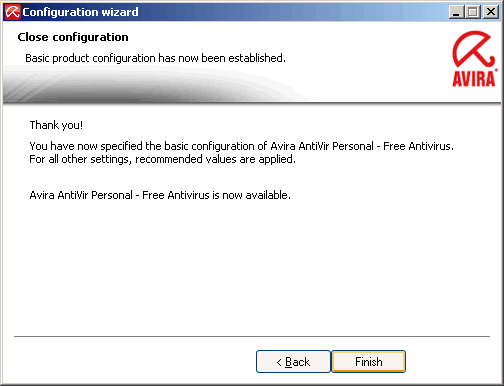
6. Click ' Finish ' on the last screen and click ' Abort ' on the initial update when it starts automatically. Click the Close button or just wait for the installation screens to disappear.
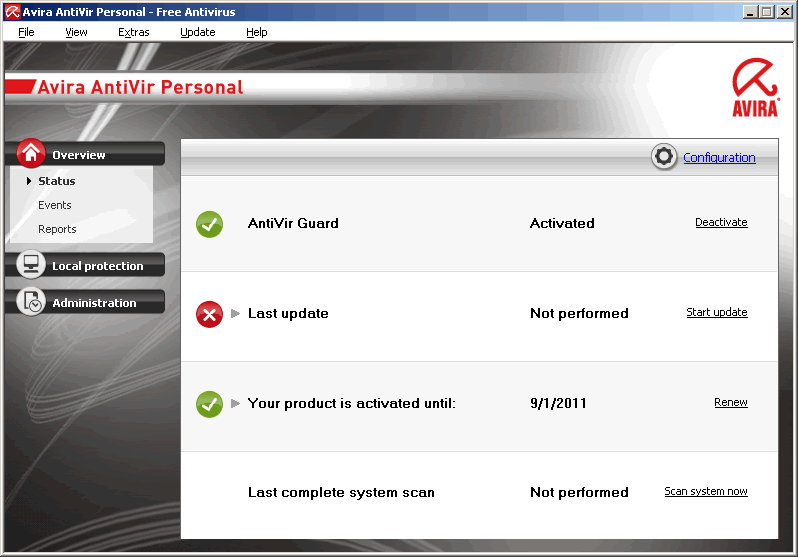
7. Open Avira by double-clicking on the red umbrella icon in the Windows Taskbar.
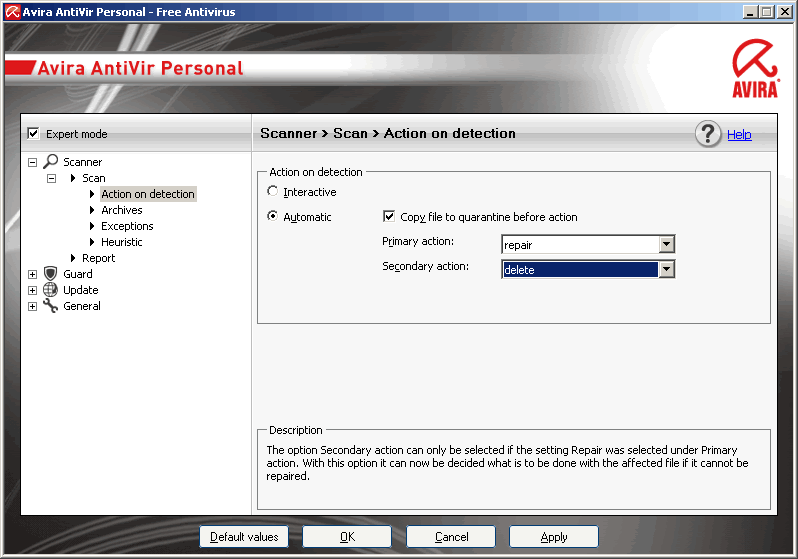
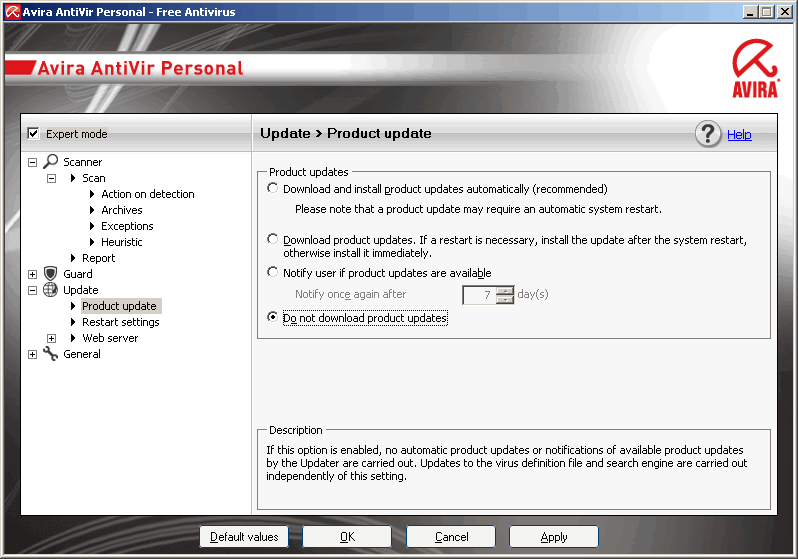
8. Check the 'Expert mode' box in the mid upper-left hand corner. Make the changes to the default settings pictured below.
8a. Select Scanner > Scan > Action on detection > Automatic, Copy file to quarantine before action, Primary action: repair, Secondary action: delete.
8b. Select Update > Product update > Do not download product updates.
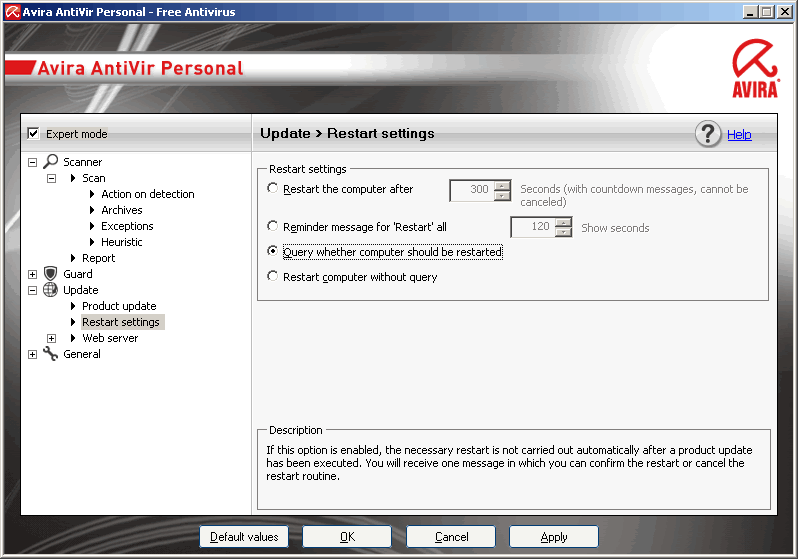
8c. Select Update > Restart settings > Query whether computer should be restarted.
8d. Uncheck General > Warnings > Files have been successfully updated, Registration with administrator rights.
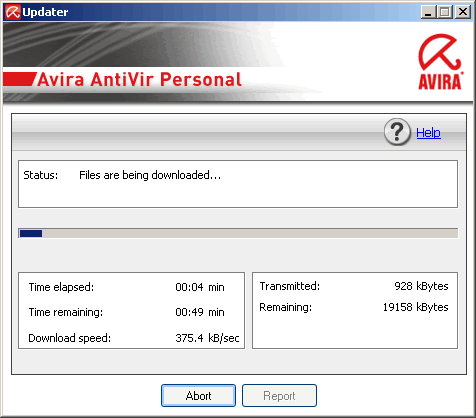
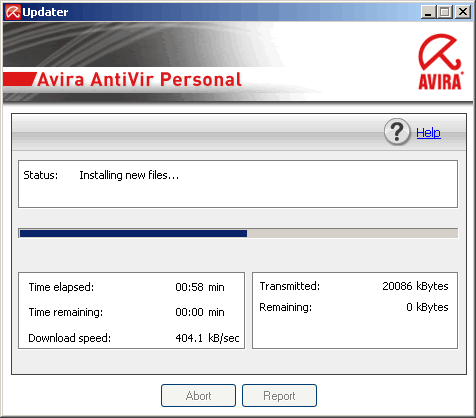
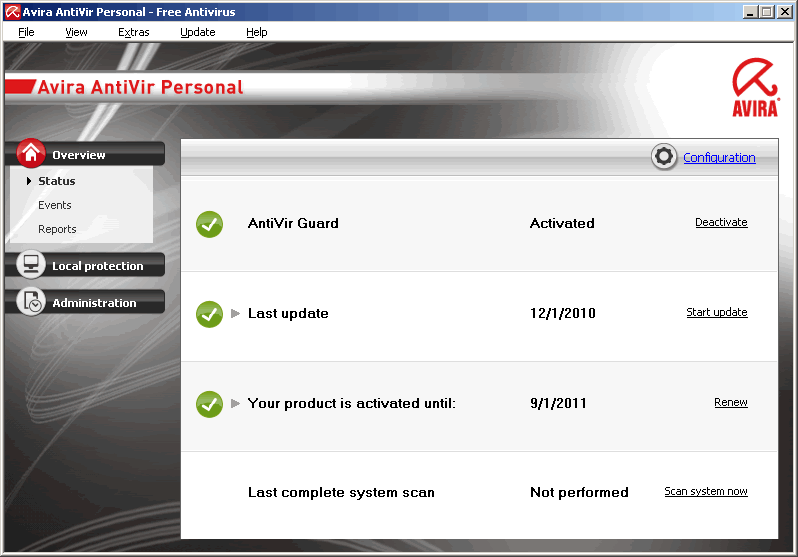
9. Back on Avira's main screen, click on the ' Start update ' link on the middle right-hand side. The update should progress as below. When it's complete, a green checkmark should replace the red X on the right of the 'Last update' row of Avira's main screen. It should also show the current date.
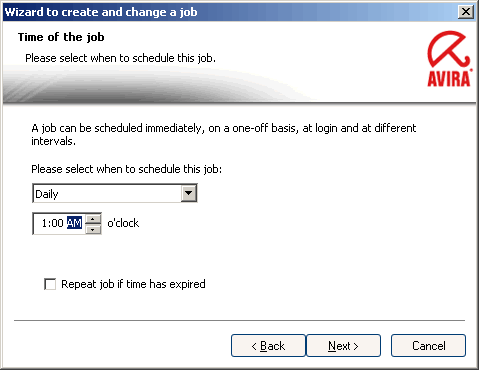
10. Finally, set up a daily shutdown scan for a time that's later than anyone normally would be using your computer. This will ensure that your system undergoes regular complete scans (in addition to being protected by Avira's realtime scanning).
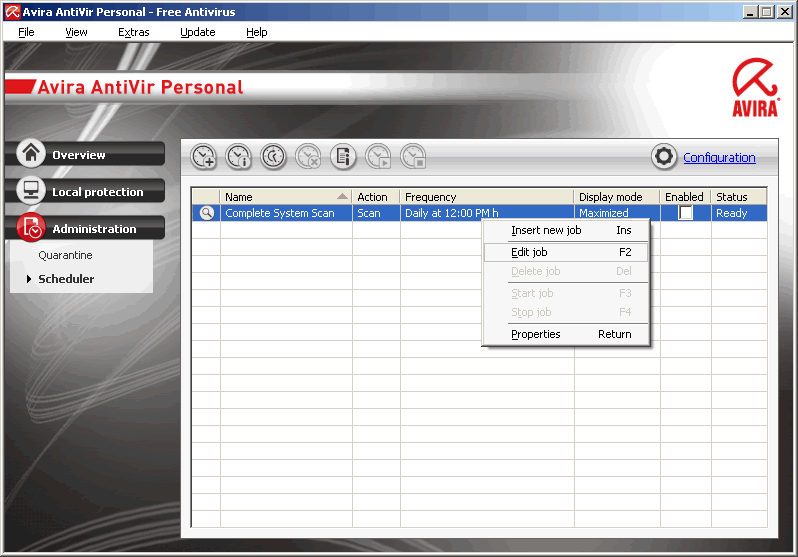
10a. From Avira's main screen select Administration > Scheduler. Right-click on the default Complete System Scan and select Edit job.
10b. On the 'Time of the job' screen, chose the time for the nightly shutdown scan to start.
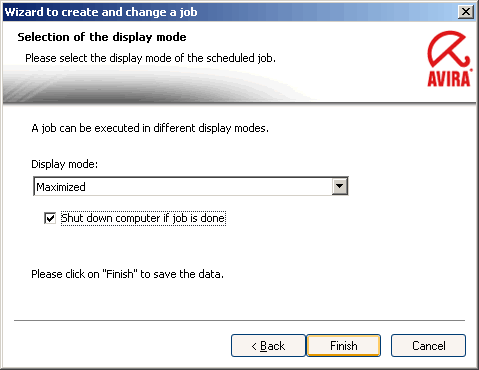
10c. On the 'Selection of the display mode' screen, check the ' Shut down computer if job is done ' box. Click Finish.
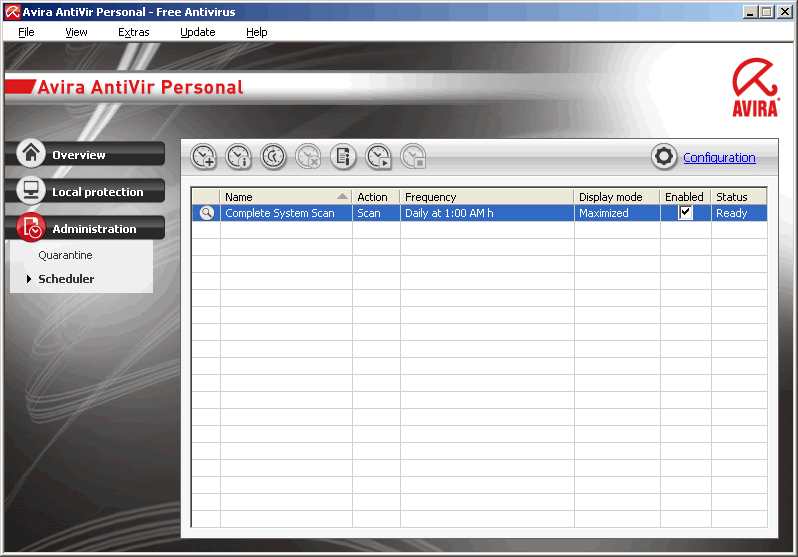
10d. Lastly, check the box under Enabled on the Complete System Scan.
Close out of the Avira window.
You're all done.
|
||||||||||||||||
|
© North Shore IT. All rights reserved.
|
||||||||||||||||